How to Install Presets and Plugins in DaVinci Resolve (Complete Guide)
If you're using DaVinci Resolve and want to enhance your editing workflow, installing custom presets and plugins is a great way to expand the software’s capabilities.
In this guide, you'll learn how to install all types of plugins and presets in DaVinci Resolve, including:
- Macro
- Fuse
- Script
- DRFX
Whether you're a beginner or a seasoned editor, this tutorial will walk you through everything you need to know to get your plugins up and running—so you can unlock the full potential of DaVinci Resolve.
1. How to Install Macros in DaVinci Resolve
Macros are Fusion compositions packaged as reusable tools that appear directly in your Effects Library. They’re perfect for custom transitions, effects, or titles.
Steps to Install Macros:
- Download the macro file (usually with a
.settingextension). - Navigate to the DaVinci Resolve user folder on your system:
- Windows:
C:\ProgramData\Blackmagic Design\DaVinci Resolve\Support\Fusion\Macros - macOS:
/Library/Application Support/Blackmagic Design/DaVinci Resolve/Fusion/Macros/
- Windows:
- Copy the downloaded
.settingfile into theMacrosfolder. - Restart DaVinci Resolve if it's open.
- You can now find the macro under the Effects > Templates > Edit or Fusion > Templates section.
💡 If the Macros folder doesn't exist, you can create it manually.
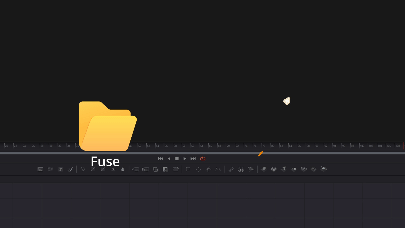
2. How to Install Fuses in DaVinci Resolve
Fuses are lightweight Fusion plugins created using Lua scripting. They add custom nodes to the Fusion page.
Steps to Install Fuses:
- Download the fuse file (with a
.fuseextension). - Navigate to the following folder:
- Windows:
C:\ProgramData\Blackmagic Design\DaVinci Resolve\Support\Fusion\Fuses - macOS:
/Library/Application Support/Blackmagic Design/DaVinci Resolve/Fusion/Fuses
- Windows:
- Copy the
.fusefile into theFusesfolder. - Restart DaVinci Resolve.
- The new node should now appear in the Fusion node library.
3. How to Install Scripts in DaVinci Resolve
Scripts are tools (usually written in Lua or Python) that automate repetitive tasks or add new features to Resolve.
Steps to Install Scripts:
- Download the script file (
.luaor.py). - Locate the Scripts folder:
- Windows:
C:\ProgramData\Blackmagic Design\DaVinci Resolve\Support\Fusion\Scripts - macOS:
/Library/Application Support/Blackmagic Design/DaVinci Resolve/Fusion/Scripts
- Windows:
- Place the script inside an appropriate subfolder like
Comp,Edit, orTooldepending on its function. - Restart Resolve. The script will appear under the corresponding menu (e.g., Fusion → Scripts).
4. How to Install DRFX Files in DaVinci Resolve
DRFX files are drag-and-drop installable plugin packages used for templates, transitions, titles, generators, and more.
Steps to Install DRFX Files:
- Download the
.drfxfile. - Double-click the file or drag it into the DaVinci Resolve interface.
- Resolve will prompt you to confirm the installation—click Install.
- The plugin will appear in your Effects Library, usually under Titles, Transitions, or Generators.
Tip: No need to restart DaVinci Resolve when using DRFX—it installs instantly.